Deis Workflow has been in GA for a while. But what’s it like to work with? Particularly, how do we set it up for production use?
In this two-part miniseries, I’ll walk you through a full production setup of Deis Workflow.
This will include:
- How to set up off-cluster object storage, Docker registry, and Postgres database
- How to install Workflow on a Kubernetes cluster
- How to secure it with SSL and set up DNS for your Workflow domain
- How to upgrade Workflow to the latest release
Let’s jump right in.
This walkthrough uses Google Container Engine (GKE), so you will need to have a Google Cloud account and a GKE Kubernetes cluster. For help with the latter, check out my previous tutorial that shows you how to spin up your first Kubernetes cluster on GKE.
You will also need a trial Compose account, because we are going to set up a Deis Workflow Postgres database and we can’t do that with Google Cloud yet.
When we get to part two, you will need a CloudFlare account so we can set up SSL and secure our deployment.
Google Cloud Service Account
A Google Cloud service account is a special type of account that your applications can use to authenticate against Google Cloud Platform APIs.
For example, if you write an application that reads and writes files on Google Cloud Storage, it must first authenticate to the Google Cloud Storage API.
In our case, we need to give Deis Workflow access to Google Cloud Storage.
To do this, open the Cloud Platform Console Credentials page. And if it’s not already selected, select the project that you’re creating credentials for.
To set up a new service account, select Create credentials and then select Service account key. Select the New service account option, set deis-workflow as the Service account name**, and then select Project and then Editor for the Role field.
That should look something like this:

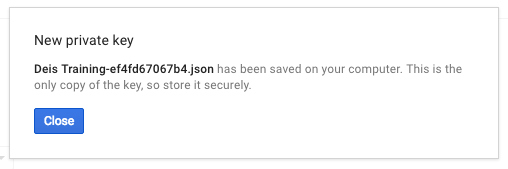
Next, choose to download the key as a JSON file.
Finally, select Create and the service key file will be created and downloaded.
Good stuff.
Our service account is set up and ready to use. Let’s move on.
Compose Account
Sign up for a trial Compose account. This will be free for 30 days. We will use Compose to create a hosted off-cluster PostgreSQL database that will be used by Workflow to store platform state.
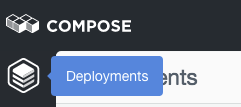
Once your Compose dashboard is open, select Deployments:
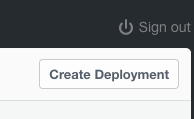
On the right, select Create Deployment:
You will get to a New Deployment window:

Select PostgreSQL from the left menu and you should see a screen like this:

Set the following:
-
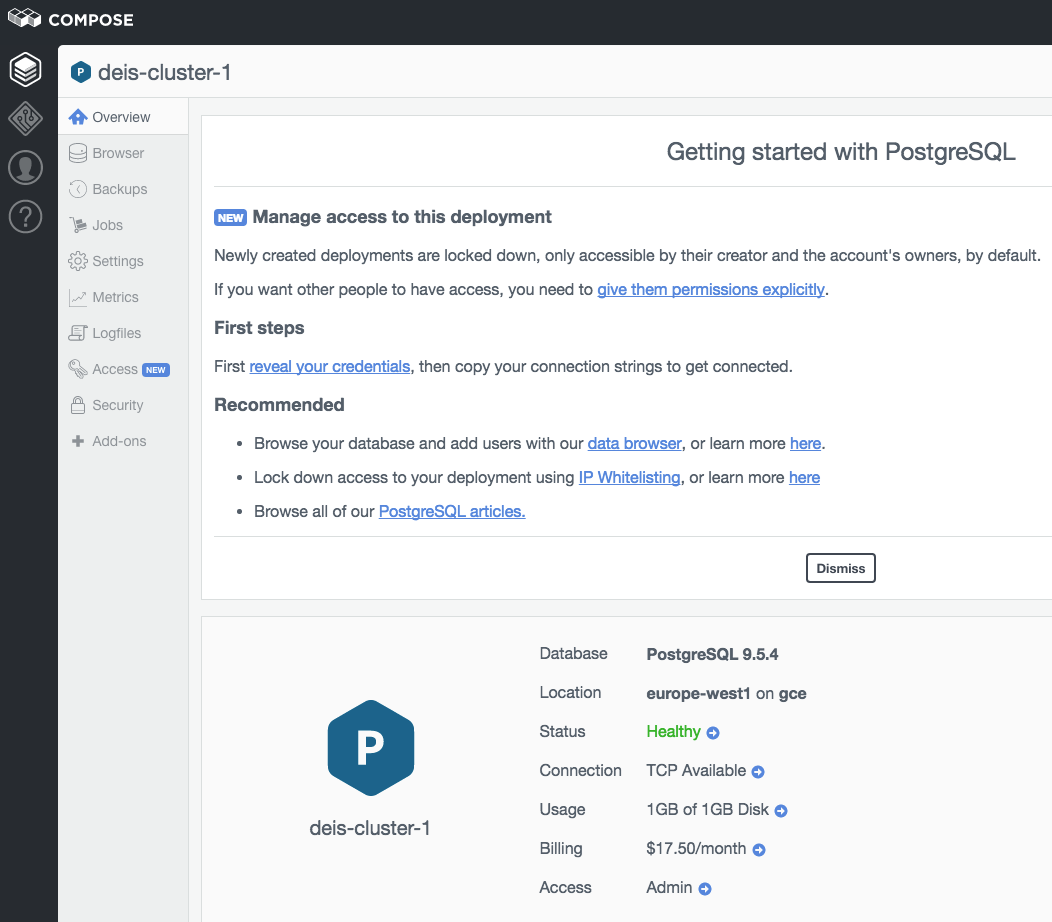
Deployment Name:
deis-cluster-1
-
Location: EU West 1 (Belgium)
-
Database Version: 9.5.4
Leave the deployment resources at the default setting.
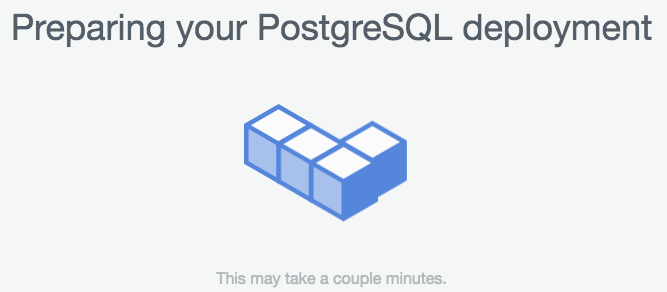
Now click on Create Deployment and wait for the deployment to be created:
Then you should see:
Click on the Browser on the left column and you should see this:
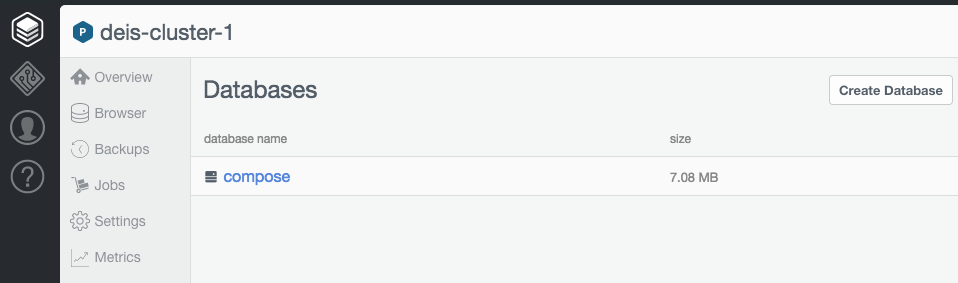
Click on Create Database and fill in deis as the database name:
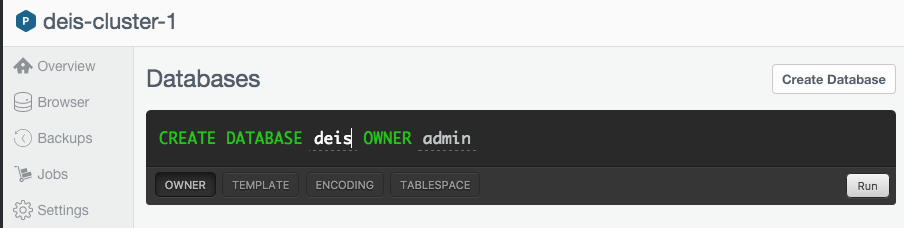
Then select Run and the deis database will be created for you.
Go back to the Overview screen (from the left menu) and scroll down to Connection Info:

Click on Show:

That will show the password and fill in the Connection string. We don’t need the connection string, but we will need the username and password later on.
Good job. Let’s leave it there for now.
Helm Classic CLI Installation
Install Deis Workflow using Helm Classic, which is a tool for installing and managing software in a Kubernetes cluster.
Install the latest helmc CLI for Linux or Mac OS X with:
$ curl -sSL https://get.helm.sh | bash
The installer places the helmc binary in your current directory, but you should move it to somewhere in your $PATH:
$ sudo mv $PWD/helmc ~/bin/helmc
Workflow CLI
Next, install the Deis Workflow CLI.
Install the latest deis CLI for Linux or Mac OS X with:
$ curl -sSL http://deis.io/deis-cli/install-v2.sh | bash
The installer places the deis binary in your current directory, but you should move it to somewhere in your $PATH:
$ sudo mv $PWD/deis ~/bin/deis
Check Your Setup
Check that the helmc command is available and the version is 0.8.1 or newer:
$ helmc --version
helmc version 0.8.1+e4b3983
Ensure the kubectl client is installed and can connect to your Kubernetes cluster. helmc uses kubectl to interact with your Kubernetes cluster.
You can test that helmc and kubectl are working properly like so:
$ helmc target
Kubernetes master is running at https://104.155.115.229
GLBCDefaultBackend is running at https://104.155.115.229/api/v1/proxy/namespaces/kube-system/services/default-http-backend
Heapster is running at https://104.155.115.229/api/v1/proxy/namespaces/kube-system/services/heapster
KubeDNS is running at https://104.155.115.229/api/v1/proxy/namespaces/kube-system/services/kube-dns
kubernetes-dashboard is running at https://104.155.115.229/api/v1/proxy/namespaces/kube-system/services/kubernetes-dashboard
If you see a list of targets like the one above, helmc can communicate with the Kubernetes master. Double check that the Kubernetes master returned by helmc target matches the expected cluster.
Fetch the Deis Workflow Chart
The Deis Chart Repository contains everything you need to install Deis Workflow onto your Kubernetes cluster with a single helmc install command.
Add the repository to Helm Classic:
$ helmc repo add deis https://github.com/deis/charts
---> Cloning into '/Users/user/.helmc/cache/deis'...
---> Hooray! Successfully added the repo.
Search for Workflow charts:
$ helmc search workflow
deis/workflow-dev - Deis Workflow (For testing only!)
...
deis/workflow-v2.4.0 - Deis Workflow
deis/workflow-v2.4.0-e2e - End-to-end tests for Deis Workflow, executed in parallel
deis/workflow-v2.4.1 - Deis Workflow
deis/workflow-v2.4.1-e2e - End-to-end tests for Deis Workflow, executed in parallel
deis/workflow-v2.4.2 - Deis Workflow
deis/workflow-v2.4.2-e2e - End-to-end tests for Deis Workflow, executed in parallel
deis/workflow-v2.5.0 - Deis Workflow
deis/workflow-v2.5.0-e2e - End-to-end tests for Deis Workflow, executed in parallel
We see that the latest Workflow chart version is v2.5.0. But we are going to learn how to do Workflow updates in the next post, so let’s fetch the v2.4.2 chart:
$ helmc fetch deis/workflow-v2.4.2
---> Fetched chart into workspace /home/user/.helmc/workspace/charts/workflow-v2.4.2
---> Done
This copies the Workflow chart to our helmc workspace.
Configuring an Off-Cluster Docker Registry and Object Storage
The Helm Classic chart for Deis Workflow can be easily configured to connect Workflow components to an off-cluster Docker registry, object storage, and PostgresSQL database. This means they are running outside of the Workflow cluster and hosted, for example, by Google Cloud or Compose.
Helm Classic lets you embed and run generators that can perform arbitrary modifications on charts before they are deployed and run. The Deis Workflow chart comes with a generate_params.toml file, which is the main configuration file for Workflow.
You can find it in this directory:
$ cd ~/.helmc/workspace/charts/workflow-vRELEASE/tpl
The values in this file are passed into the appropriate services so they can configure themselves as needed.
Specifically, for us, we can use this file to specify off-cluster locations for:
By default, the generate_params.toml file configures all of these to be on-cluster, which results in a stateless setup and is not recommended for a production setup.
To read more about Helm Classic generators, see the docs.
To continue, we must make some edits to the generate_params.toml file that corresponds with the chart we fetched, which is here:
~/.helmc/workspace/charts/workflow-v2.4.2/tpl/generate_params.toml
Set Up an Off-Cluster Registry
Deis Workflow currently supports these external Docker registries:
We are using GKE, so set registry_location to to gcr:
# Set the location of Workflow's Registry
#
# Valid values are:
# - on-cluster: Run registry within the Kubernetes cluster
# - off-cluster: Use registry outside the Kubernetes cluster (example: dockerhub,quay.io,self-hosted)
# - ecr: Use Amazon's ECR
# - gcr: Use Google's GCR
registry_location = "gcr"
Next, in the gcr section of this file, we need to configure a few things.
Set key_json to the content of the Google Cloud service account JSON key file we saved before. And hostname can be empty, but needs to be set if the hostname is different from https://gcr.io.
The resulting section should look something like this:
[gcr]
key_json = '''{
  "type": "service_account",
  "project_id": "my-project",
  "private_key_id": "ae56c19qrqr9cabbwtw9d9d8464565d07f54095463d2bc2",
  "private_key": "-----BEGIN PRIVATE KEY-----\nMIIEvgIBADANBgkqhkiG9w0BAQEFAASCBKgwggSkAgEAAoIBAQCQgkWjrptVk1sk\n5l0xmB2t9sa+XsZRgeoBytI8HsAjlXsXE/56pX+61NyA23eFzOOrhVNYGQ/xCh5s\ns/62qhqL
...
K4u9vZIrlGnCqvnQfe+4cMaQVofStYwV/RFFh3Gjpf8FZfX70W3TG8b\nlVM92yhhJFv46Ogf+sVe3y1k\n-----END PRIVATE KEY-----\n",
  "client_email": "service-account1@my-project.iam.gserviceaccount.com",
  "client_id": "10834853542996725235325325",
  "auth_uri": "https://accounts.google.com/o/oauth2/auth",
  "token_uri": "https://accounts.google.com/o/oauth2/token",
  "auth_provider_x509_cert_url": "https://www.googleapis.com/oauth2/v1/certs",
  "client_x509_cert_url": "https://www.googleapis.com/robot/v1/metadata/x509/service-account1%40my-project.iam.gserviceaccount.com"
}'''
hostname = ""
To read more about off-cluster registry setup, see the docs.
Set Up Off-Cluster Object Storage
Deis Workflow currently supports these off-cluster object stores:
-
Google Cloud Storage (GCS)
- Amazon S3
- Azure Blob Storage
- OpenStack Swift Storage
We’re using GCS, so set storage to gcs:
Then, in the gcs section, set key_json to the content of the Google Cloud service account JSON key file.
You also need to specify which bucket to use for the Workflow builder by editing builder_bucket. The Workflow GCS integration also lets us use GCS for our registry and database but we’re using GCR and a hosted PostgreSQL instance, so we can leave the registry_bucket and database_bucket values as they are.
If you configure a GCS bucket that does not exist, Workflow will create it for you in US region. If you do not want this, you can create the bucket for yourself in the region and zone prefered.
Also note that GCS bucket names must be unique across all Google Cloud projects.
When you’re done, the gcs section should look something like this:
[gcs]
# key_json is expanded into a JSON file on the remote server. It must be
# well-formatted JSON data.
key_json = '''{
  "type": "service_account",
  "project_id": "my-project",
  "private_key_id": "ae56c19qrqr9cabbwtw9d9d8464565d07f54095463d2bc2",
  "private_key": "-----BEGIN PRIVATE KEY-----\nMIIEvgIBADANBgkqhkiG9w0BAQEFAASCBKgwggSkAgEAAoIBAQCQgkWjrptVk1sk\n5l0xmB2t9sa+XsZRgeoBytI8HsAjlXsXE/56pX+61NyA23eFzOOrhVNYGQ/xCh5s\ns/62qhqL
...
K4u9vZIrlGnCqvnQfe+4cMaQVofStYwV/RFFh3Gjpf8FZfX70W3TG8b\nlVM92yhhJFv46Ogf+sVe3y1k\n-----END PRIVATE KEY-----\n",
  "client_email": "service-account1@my-project.iam.gserviceaccount.com",
  "client_id": "10834853542996725235325325",
  "auth_uri": "https://accounts.google.com/o/oauth2/auth",
  "token_uri": "https://accounts.google.com/o/oauth2/token",
  "auth_provider_x509_cert_url": "https://www.googleapis.com/oauth2/v1/certs",
  "client_x509_cert_url": "https://www.googleapis.com/robot/v1/metadata/x509/service-account1%40my-project.iam.gserviceaccount.com"
}'''
registry_bucket = "your-database-bucket-name
database_bucket = "your-database-bucket-name"
builder_bucket = "my-deis-builder1"
To read more about off-cluster object storage, see the docs.
Configure an Off-Cluster Postgres Database
Because we have an off-cluster PostgreSQL database set up, we can configure database_location to off-cluster:
# Set the location of Workflow's PostgreSQL database
#
# Valid values are:
# - on-cluster: Run PostgreSQL within the Kubernetes cluster (credentials are generated
#   automatically; backups are sent to object storage
#   configured above)
# - off-cluster: Run PostgreSQL outside the Kubernetes cluster (configure in database section)
database_location = "off-cluster"
Now, grab those connection settings from before and fill in the connection config:
[database]
...
# Configure the following ONLY if using an off-cluster PostgreSQL database
name = "deis"
username = "admin"
password = "compose.io_password"
host = "gcp-europe-west1-cpu.1.dblayer.com"
port = "12345"
That’s it. We’re done.
To read more about off-cluster Postgres, see the docs.
Now, let’s move on to Workflow installation.
Your generate_params.toml file has been configured. All that’s left to do now is generate a customized Workflow chart by running:
$ helmc generate -x manifests workflow-v2.4.2
---> Ran 19 generators.
This will generate Deis Workflow configuration files for Kubernetes namespaces, service accounts, services, secrets, deployments, and daemon sets.
Now, install Workflow like so:
$ helmc install workflow-v2.4.2
---> Running `kubectl create -f` ...
namespace "deis" created
secret "builder-ssh-private-keys" created
...
deployment "deis-controller" created
deployment "deis-registry-token-refresher" created
deployment "deis-router" created
deployment "deis-workflow-manager" created
daemonset "deis-logger-fluentd" created
daemonset "deis-monitor-telegraf" created
========================================
# Workflow 2.4.2
Workflow is installed. Awesome.
In this post we learnt how to configure and install Deis Workflow on Google Container Engine with off-cluster persistent object storage, container registry, and platform database.
In the next post we will learn how to secure Workflow with SSL, set the platform domain, register a user, and perform a Workflow platform upgrade.