Many people we talk to are interested in experimenting with Kubernetes but find that putting together a development environment is daunting.
Kubernetes Solo OSX (Kube Solo) provides a lightweight, simple Kubernetes enviroment that is easy as a few clicks.
Kube Solo wraps coreos-xhyve and runs in your Mac’s status bar. With a few clicks Kube Solo provisions a CoreOS server and boostraps Kubernetes development environment.
Since Kube Solo is based on xhyve there is no need to have VirtualBox and Vagrant installed on your Mac.
Kube Solo’s only external dependency is iTerm2. So make sure you download and install iTerm first.
Download the latest release from Kube Solo Releases.
On first launch, Kube Solo will prompt for configuration information then automatically download the appropriate CoreOS ISO image and bootstrap a Kubernetes cluster. After installation completes you will have a fully functional local Kubernetes environment. More information about what’s done during the install is available in the README.
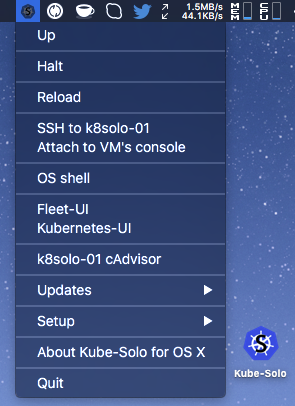
From the status bar icon you can:
- Start, stop or reboot the underlying CoreOS VM
- SSH to the CoreOS VM
- Attach to the CoreOS VM’s console
- Launch a pre-configured shell session with the appropriate environment and binaries in place
- Upgrade your Kubernetes environment when a new version is available
- View your fleet units with Fleet-UI
- View the Node, Pods and Replication Controllers via Kubernetes-UI
Here’s a screenshot of the menu:
Now you’re set up, check out the official Kubernetes examples to get you started.
Happy Kuberneting!
P.S. If you are in Barcelona on November 20th, join us at Distributed Matters Barcelona. I will be teaching an introductory class on CoreOS, Docker and the Deis PaaS. I’d love to see you there!